As an iOS developer I sometimes ask for a 1024×1024 PNG image to use as app icon, and as you probably know this image has to be resized to a few different formats in order to be used in the app.
There are great tools out there, some of them available in the Mac App Store, but I wanted to try building a simple one to use as a command line tool. As usual, I shared the code on GitHub and I wrote this post hoping to be of help to some fellow developers.
Configure the project
Let’s start by creating a new project in Xcode, but instead of creating an app like many of us usually do, we go the macOS tab to create a command line tool.
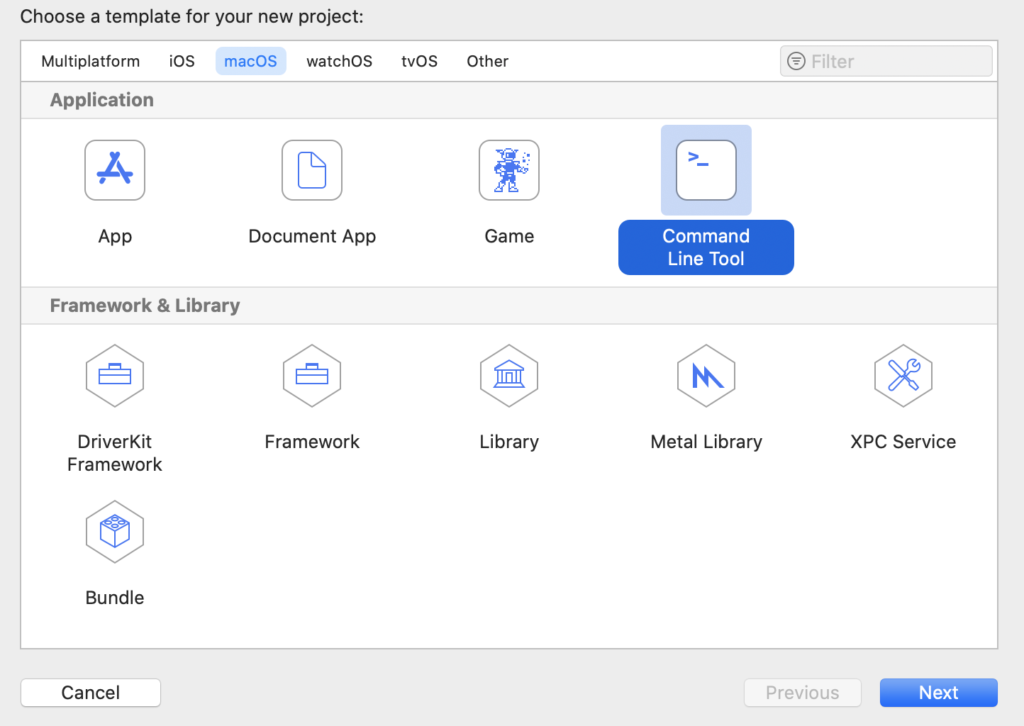
As you can see, Xcode creates a main.swift file and the execution starts from there.
You can simply print something on the screen, like you’d do on a Playground. If you build and run, the tool is executed and you can see its output on the console.
We want to build something useful, and as you can imagine, we need to pass some parameters to the tool, let’s see how.
ArgumentParser
Apple has open sourced a framework to help us with parsing command line arguments. It is called ArgumentParser and you can find it here on GitHub. In order to use it in our tool, we need to add it as a dependency with Swift Package Manager. If you’re not familiar with it, take a look at my previous post about SPM.
ArgumentParser uses Property Wrappers, you may have seen them if you came across SwiftUI, anyway this is my post about PW.
The code below can be found in main.swift in my example.
struct AssetCreator:ParsableCommand {
    @Argument var imagePath:String
    @Argument var outputPath:String
    @Option var configurationPath:String?

    func run() {
        let helper = AssetCreatorHelper(withConfigurationAtPath: configurationPath)
        let result = helper.createAssetFromImage(atPath: imagePath, outputPath: outputPath)
        if result == false {
            print("Error while creating asset images")
        }
        else {
            print("Asset images created at \(outputPath)")
        }
    }
}

AssetCreator.main()
As you can see we use a struct conforming to ParsableCommand. This is useful with command line tools like ours, as we can call the main method on it, and it will start the execution of our command without us taking care of all the stuff. If you’re interested in more details, you can see the definition of ParsableCommand on GitHub.
The main() function eventually calls run, the function we implemented in our struct, so we can put the main logic there.
Now let’s see how we can parse command line arguments. Turns out, we don’t have much to do.
We can use two different Property Wrappers: @Argument is a mandatory argument, this means the execution will fail if the user doesn’t provide it. Try running the tool, you’ll see some help printed on the console. This all comes for free by adopting the framework, isn’t it cool?
If you want to provide options, you can use the @Option property wrapper. In our example the variable name is configurationPath, so the command line tool expects a –configuration-path string if you want to specify the option, but it isn’t mandatory. As you can see, the variable is optional, I can call the class without a configuration and use the default one.
That’s it! Really convenient and fast, I like ArgumentParser.
A quick tip, if you want to test your app in Xcode you may need to specify parameters, as in this example. Turns out you can do it by editing the scheme.

In my project I put my source file in /tmp and also in /tmp I have a configuration file passed as –configuration-path, and /tmp/asset is my second mandatory parameter mapped to outputPath in my code.
Building Assets
Finally, as the example is about generating images for assets, a quick intro about them.
At this link you can find the official documentation about the Asset Catalog. This example is about app icons, but the Asset Catalog is not restricted to those, you can put any sort of images there, and you can also add colours. You can have different images and colours to support dark mode, if you’re interested I wrote about it in this post.
I suppose you opened this post mainly to read about command line tools, but since you’re here you may be interested about how to create the assets so let me talk about it.
Let’s start with the class AssetCreatorHelper, responsible to read the original image and create all the asset images from it.
 func createAssetFromCGImage(_ cgImage:CGImage,
                                    originalName:String,
                                    outputPath:String) -> Bool {
    if FileUtils.createDirIfNotExists(path: outputPath) == false {
        return false
    }
    for asset in assetsToProcess {
        guard let resizedImage = ImageUtils.resizeImage(cgImage, size: asset.size) else {
            print("error while resizing image")
            return false
        }
        let imageName = getImageName(forAsset: asset, originalName: originalName)
        let imagePath = (outputPath as NSString).appendingPathComponent(imageName)
        if ImageUtils.savePNGImage(image: resizedImage,
                                   toUrl: URL(fileURLWithPath: imagePath)) == false {
            print("error while saving image to \(imagePath)")
            return false
        }
    }
    return true
}
This is the main function, iterates through the array of assets, either loaded from a JSON file or from the global variable defaultConfiguration. Each entry is described by a simple struct with the CGSize and a suffix, so we can create the file name from the original image name adding the suffix (of course we don’t want name collision, or we’ll overwrite images).
The class ImageUtils contains some static functions to load a PNG image from disk, resize it and save it as a PNG. I’m using CoreGraphics, available on macOS as well as iOS so this class can be used on iOS apps as well. By the way, I usually put this utility functions and classes in my GitHub repository called GFSwiftUtilities so check it out, you may find something useful for your project and you don’t need to import it as a SPM, you can just copy and paste from the files if you need only a few of my utilities.
Hope you found this post useful, it is just a simple experiment with a command line tool but as you can imagine there are lots of repetitive tasks we may automate with this approach,.
Happy coding 🙂