If you follow me you know I like sharing code on GitHub and distribute small utilities via Swift Package Manager (by the way this is my article about SPM).
Sometimes though, we cannot share our source code and need our customers to integrate our package. We can’t share the code via SPM, so we need to find another way to give them a binary. Another scenario is the customer asking you for the Xcode project, because he wants to integrate building your project in its CI, but you don’t want him to have access to all the source code.
To solve those problems, I used to make static libraries with an header file. I built the libraries with both x86 and arm binaries so they could be used on the simulator and on an actual device.
There is however a better way, and it is building XCFrameworks.
An XCFramework is distributable binary package including multiple platforms, such as iOS, macOS and the simulator. You don’t need an header file, you can just drag the xcframework in your project, import the module and start using it, just like you’d do with a framework imported via SPM.
This is the link to a WWDC session you may want to check out.
Start with a framework
In order to create an xcframework, you need to have a framework.
I always want my post to have a counterpart GitHub project, but this time I didn’t feel like creating a new one so I updated my GFBarcodeScanner swift package to support a binary version.
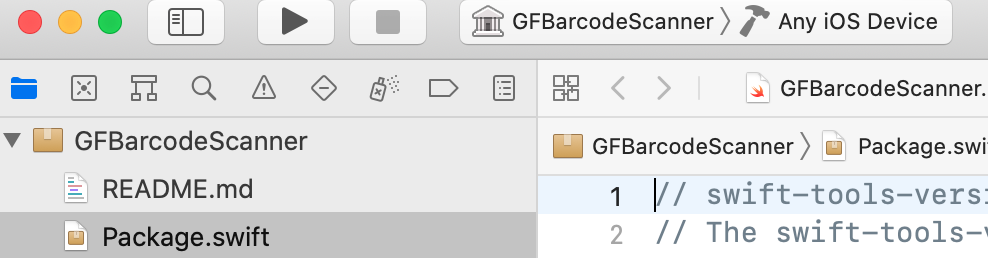
A quick tip, if you start from a Swift package and open it in Xcode, you see something similar to the image below, where you don’t have an actual xcodeproj.
If you need to make an xcodeproj from a Swift package, type
swift package generate-xcodeproj
and open that project instead.
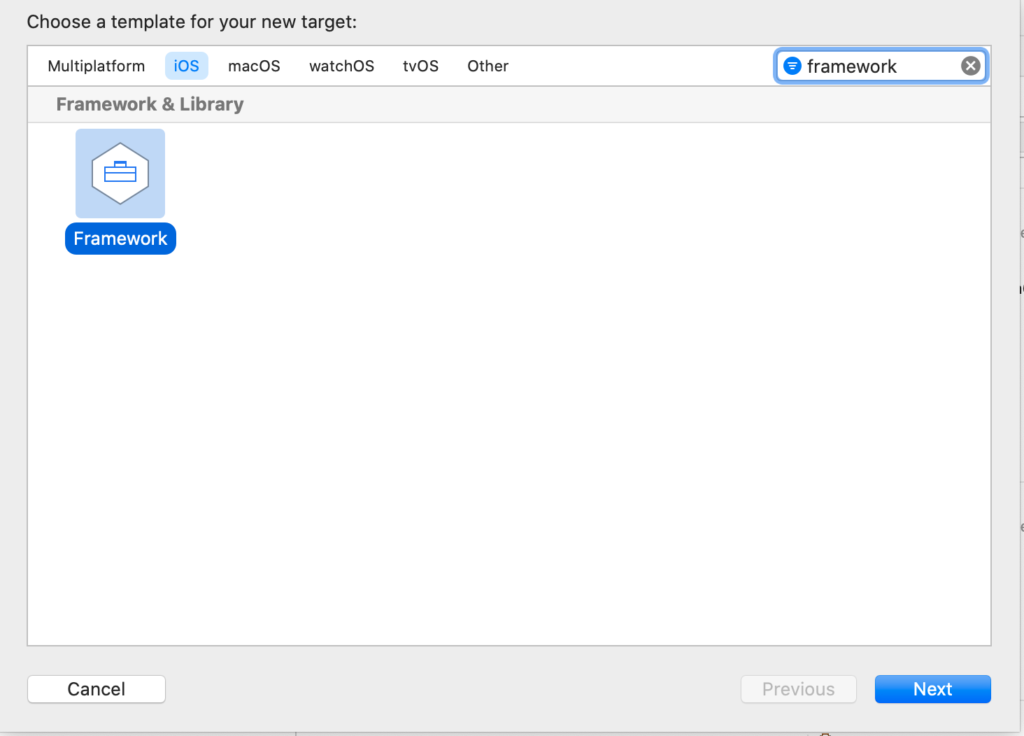
Now it is time to make the framework, create a new target of type Framework
make sure to include all of your sources in Build phases. If you start from a swift package you should already have a Framework target set, so this step may not be necessary.
Remember to set Build libraries for Distribution to YES in Build settings
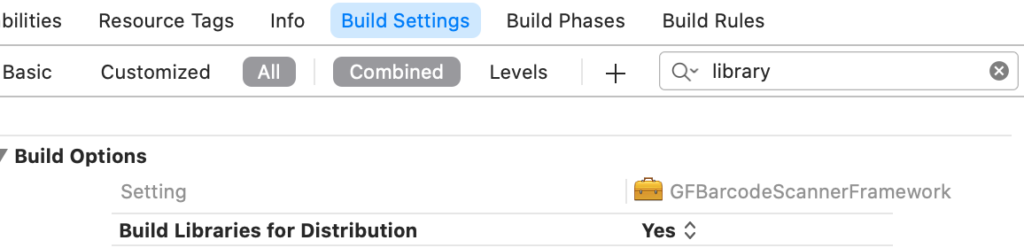
so Xcode will generate public interfaces for the libraries.
Next, you have to build the framework for iOS and the simulator (and other platforms if you need to).
I’ll show you how to do it in Xcode first, then via command line. I prefer the latter, as I can run a simple shell script to clean and build everything from scratch once I make changes to the code.
If you want to do everything in Xcode you can create a scheme attached to your target and just press the play button, but make sure you have the scheme set to Release. Otherwise you can archive instead of running, but once you select a simulator, the archive option is disabled, so it is not feasible if you need to include the simulator.
Build the XCFramework
All right, now that we have both versions (simulator and device) of our framework, is time to create the actual xcframework.
Turns out, we need to use command line, but as I promised I will show you how to do everything in Xcode first.
Let’s create a new target, if you opened my GitHub project the target is called XCFramework.
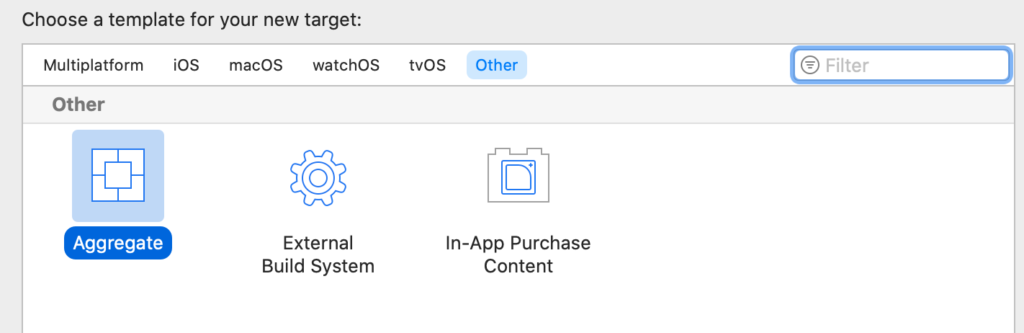
This time, select Aggregate.
What is this target for? We can use it to have a custom script in Build Phases, where we create the XCFramework. Make sure to create a scheme associated to the new target, so you can run it when you’re ready to create your XCFramework.
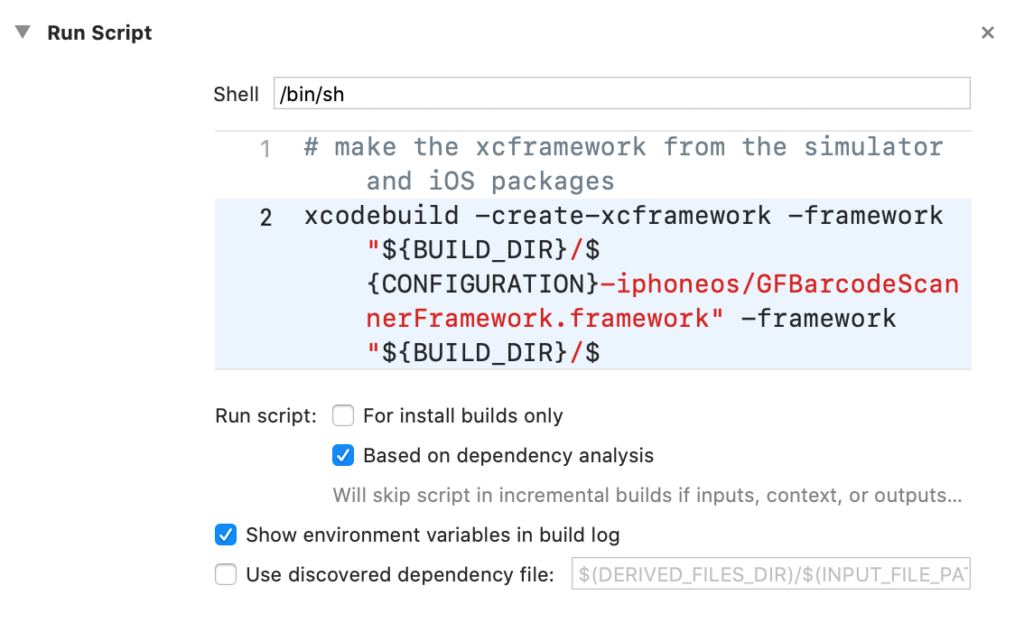
I’ll paste the complete script here. You basically have to call xcodebuild -create-xcframework and pass all the frameworks you want to include. In this example, we have two of them, one for the simulator, one for the actual device.
# make the xcframework from the simulator and iOS packages
xcodebuild -create-xcframework -framework "${BUILD_DIR}/${CONFIGURATION}-iphoneos/GFBarcodeScannerFramework.framework" -framework "${BUILD_DIR}/${CONFIGURATION}-iphonesimulator/GFBarcodeScannerFramework.framework" -output "${BUILD_DIR}/GFBarcodeScanner.xcframework"

# open the project's directory in Finder so you can copy your xcframework

open "${BUILD_DIR}"
At the end of the script I open the building directory, so you can see your xcframework and copy it elsewhere.
The ${CONFIGURATION} variable is Debug or Release, as I told you before I set the schemes to Release so you can press the play button on the framework scheme and on the XCFramework and always build for Release.
Command line script
And here’s the command line script I use to build my xcframeworks. As I said, I’d much rather run a shell script than open Xcode and press a few buttons to make everything I need.
# I start by cleaning the old framework

xcodebuild -project GFBarcodeScanner.xcodeproj -configuration Release -target GFBarcodeScannerFramework -sdk iphonesimulator clean
xcodebuild -project GFBarcodeScanner.xcodeproj -configuration Release -target GFBarcodeScannerFramework -sdk iphoneos clean

# then I build the simulator and device version of the framework

xcodebuild -project GFBarcodeScanner.xcodeproj -configuration Release -target GFBarcodeScannerFramework -sdk iphonesimulator build
xcodebuild -project GFBarcodeScanner.xcodeproj -configuration Release -target GFBarcodeScannerFramework -sdk iphoneos build

# and finally I create the xcframework from them

xcodebuild -create-xcframework -framework build/Release-iphoneos/GFBarcodeScannerFramework.framework -framework build/Release-iphonesimulator/GFBarcodeScannerFramework.framework -output build/GFBarcodeScanner.xcframework
The last line of the script is similar to the one we added as Run Script in the XCFramework target. In this example, I had to add the -project argument as there are more xcodeproj files, but usually you don’t have to.
Add a framework to your project
A quick addition to my article since I run into a problem and spend a couple of hours trying to solve it.
When you want to use an XCFramework in your app make sure to follow these steps.
Drag and drop the framework in your project, so it is added to the target.
Then, open the tab General and make sure to embed&sign the framework like shown below
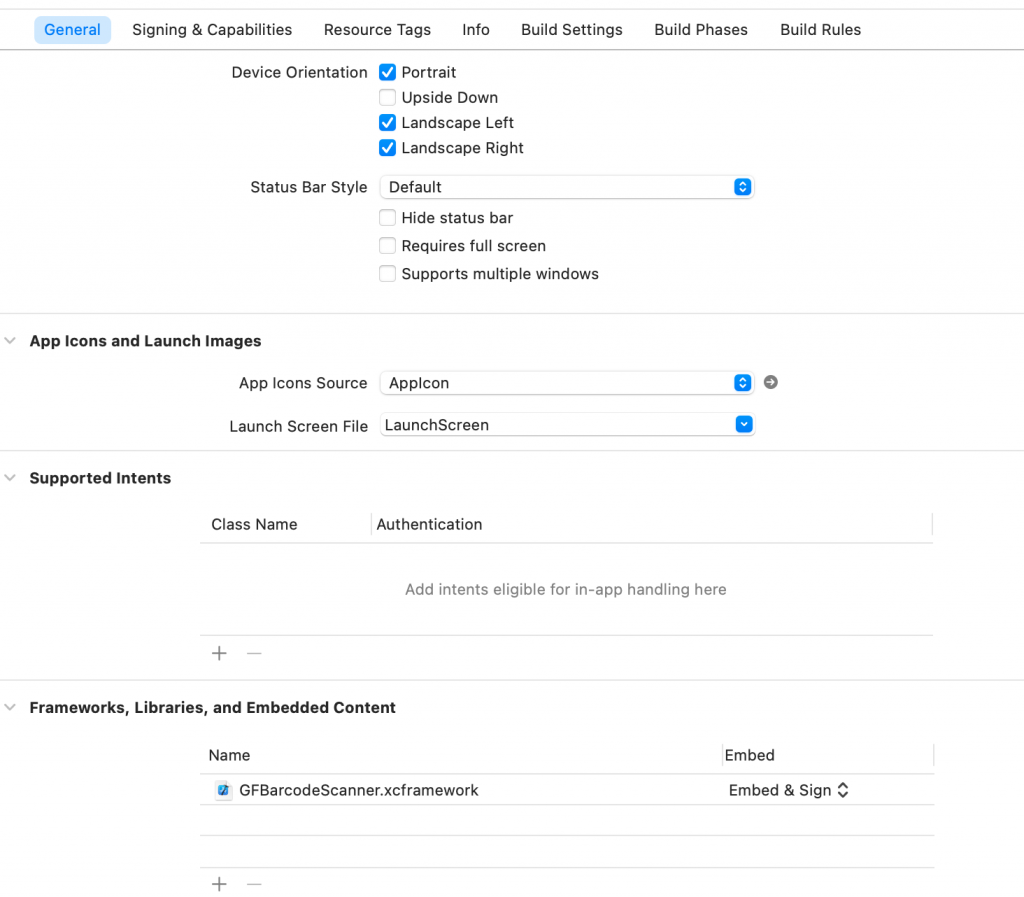
The default is Do not Embed.
Then go to the Build Phases tab and make sure the framework is listed in Embed Frameworks
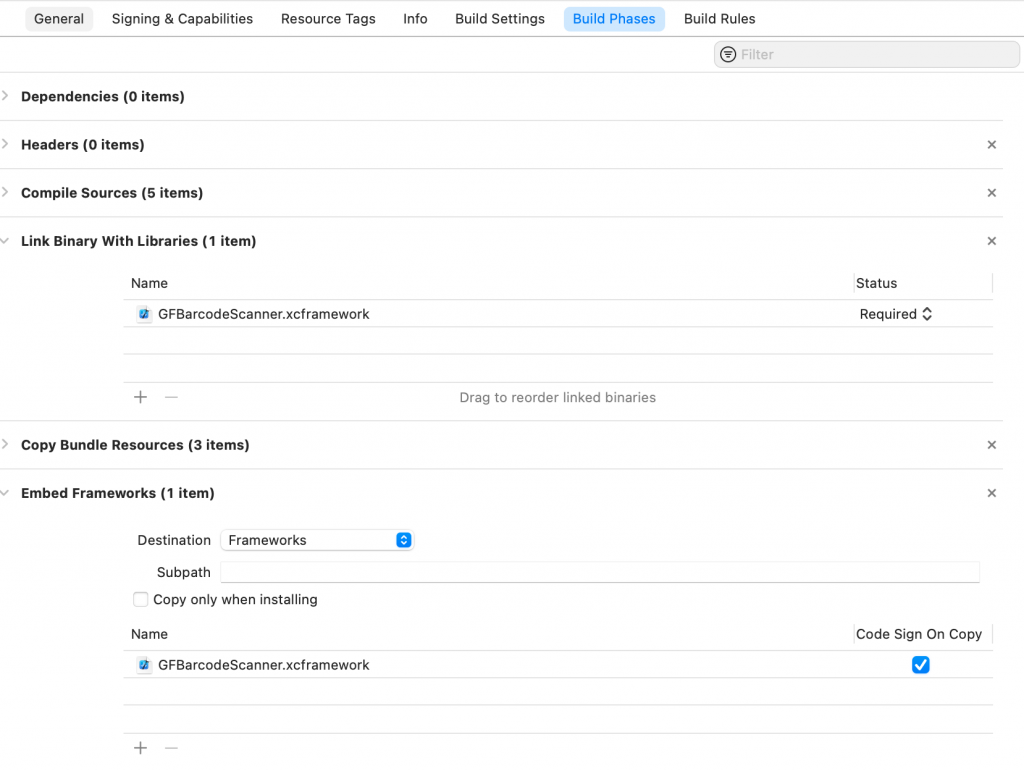
as you can see the xcframework is listed under Link Binary With Libraries and Embed Frameworks. The only way to activate Embed Frameworks in Build Phases is to have at least a framework with embed&sign in the General tab.
Hope this fill save you some headache when working with third party frameworks 🙂
Conclusion
You may note I exported my GFBarcodeScanner framework calling it GFBarcodeScannerFramework. I did it because otherwise I got building errors while importing the framework. It may be related to this bug https://bugs.swift.org/browse/SR-5304
And finally, why I started using XCFrameworks? Because I run into the error “Building for iOS Simulator, but the linked and embedded framework ‘Myframework.framework’ was built for iOS + iOS Simulator.” It happens because some frameworks are distributed with both simulator and device binary embedded in them, but they’re not XCFrameworks and Xcode is complaining about that, it started with a warning with Xcode 11 and with 12.3 is not a build time error.
You can solve the problem by setting Validate Workspace to YES in Build settings, but for the frameworks I build I preferred to migrate to XCFrameworks instead of static libraries or frameworks with the a binary created by merging more platforms.
Happy coding 🙂