Here’s a quick guide to implement Push notifications on iOS.
Every now and then I need to implement push notification and I always forget how to create the certificate and convert it to use with python, so this guide will be helpful to the future myself and hopefully to some fellow developers 😉
Actually, creating the certificate the is easy and maybe this article will look too much for dummies (yes, I provided screenshots of the developer portal) but you’ll find the shell commands at the end of it useful.
Create an App ID
In order to implement push notifications you need to have a specific app id on your profile. If you’ve only used the wildcard app id for your tests you’ll need to create an app id for the project.
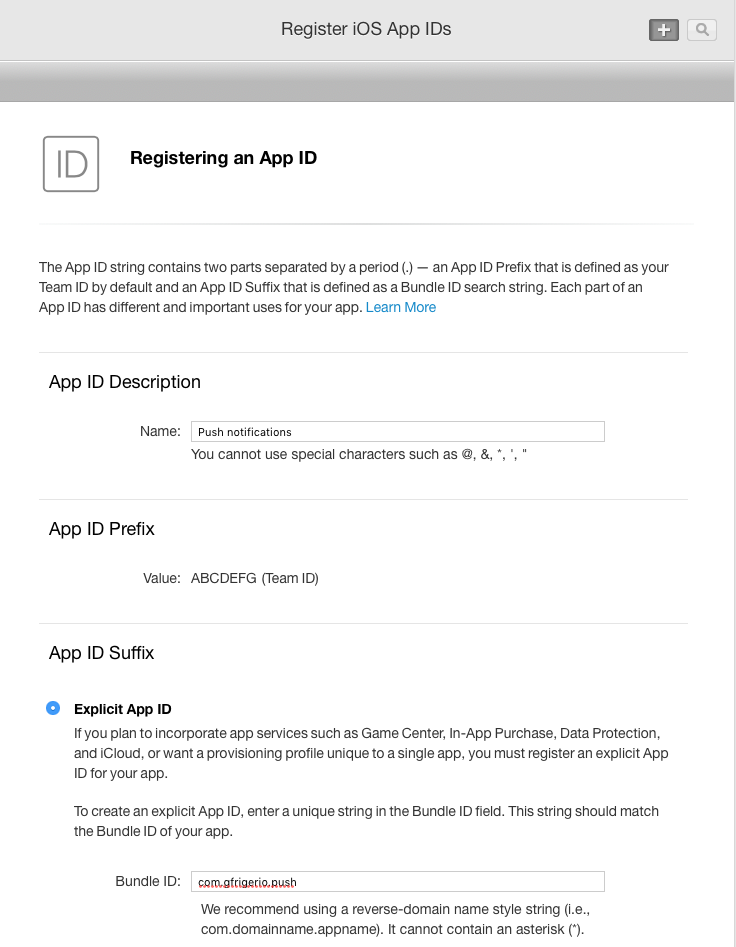
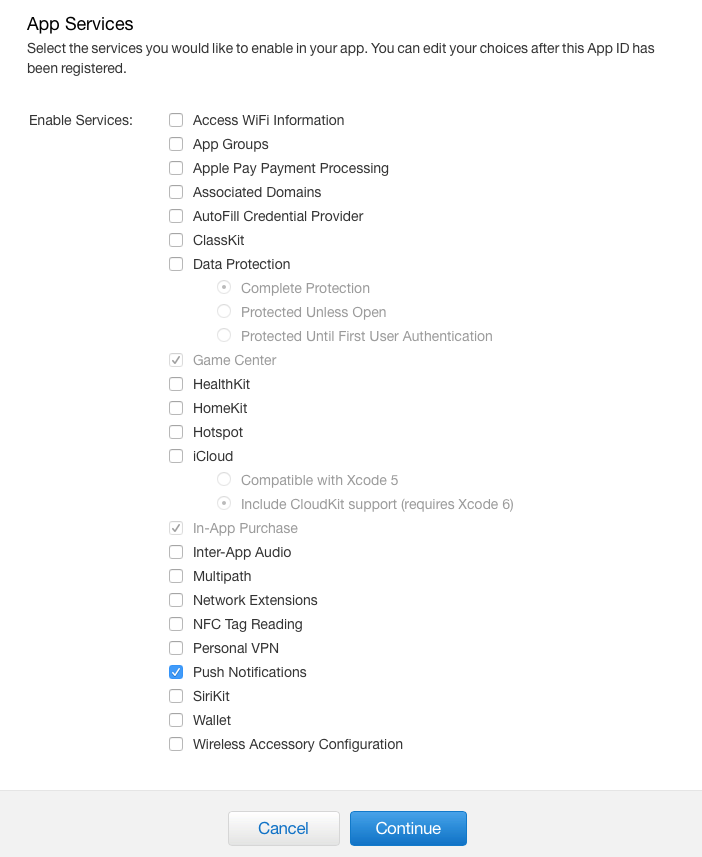
Create the certificate
Once you have an explicit App ID you can create a push notification service certificate. The screenshots are for the sandbox, only for testing, but creating the production certificate is exactly the same thing, you only have to check the correct option during the first step.

ok, I won’t put the screenshots of Keychain Access to request a certificate, the developer portal already tell you what to do.
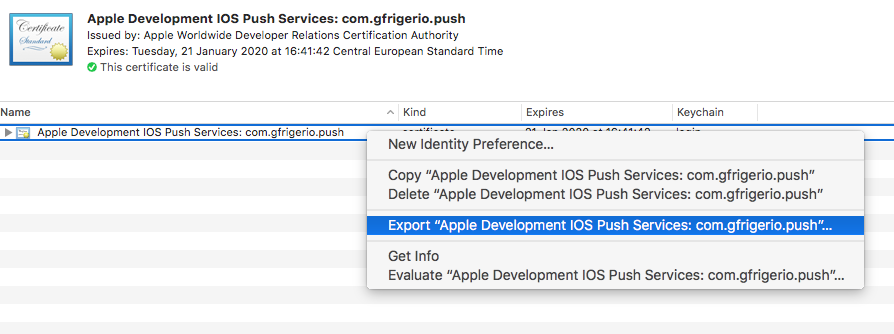
Export the certificate
Once you have the certificate download it and double click to install on your Mac, then open Keychain Access in order to export it, we’ll use the p12 format.
Keychain Access asks you to set a password, you can leave it blank
Now you have a .p12 containing your certificate and the private key. What you need is a .pem certificate containing both.
Open the command line and go to the directory where you exported the p12 (I’ll assume is called certificate.p12), then type the following commands:
openssl pkcs12 -nocerts -out key.pem -in certificate.p12

openssl pkcs12 -clcerts -nokeys -out certificate.pem -in certificate.p12
the first command export the private key from your p12 and save it to key.pem, the second command only exports the certificate without the private key saving it to certificate.pem.
You know have to save both on the same file and you don’t need any fancy command line tool, just cat
cat key.pem certificate.pem > pushcertificates.pemThe file pushcertificates.pem is the one you’ll use in python to send a push notification, but you have to do something on your device first.
If you set a password while exporting the certificate and don’t want to be bother with it every time you use the certificate you can remote it with this command
openssl rsa -in key.pem -out key.pemGet the device token
Each push notification is delivered to a single iOS device, so you have to get the device token in order to send it a push notification.
To test if the certificate and our python script work we can just copy and paste the token, but keep in mind you have to store the tokens on your server if you want to send push notifications to your users.
You can’t send push notifications to the simulator, so you need a device to test.
In order to get the device token you need to ask for permission to receive push notifications.
Since iOS 8 the procedure has changed, so if you need to support iOS 7 you have to check if isRegisteredForRemoteNotification is available
UIApplication *application = [UIApplication sharedApplication];
if ([application respondsToSelector:@selector(isRegisteredForRemoteNotifications)])
 {
    // iOS 8 Notifications
    [application registerUserNotificationSettings:[UIUserNotificationSettings
                                                           settingsForTypes:(UIUserNotificationTypeSound |
                                                                             UIUserNotificationTypeAlert |
                                                                             UIUserNotificationTypeBadge)
                                                           categories:nil]];

    [application registerForRemoteNotifications];
}
else
{
    // iOS < 8 Notifications
    [application registerForRemoteNotificationTypes:
             (UIRemoteNotificationTypeBadge | UIRemoteNotificationTypeAlert | UIRemoteNotificationTypeSound)];
}
UNUserNotificationCenter.current().requestAuthorization(options: [.alert, .sound, .badge]) {
            granted, error in
            if granted {
                print("Permission granted!")
                DispatchQueue.main.async {
                    UIApplication.shared.registerForRemoteNotifications()
                }
            }
            else {
                print("error while getting permission \(String(describing: error))")
            }
        }
once you gain permission from your user, and each time your app starts, a function in your app delegate is called to give you the device token
Objective-C- (void)application:(UIApplication*)application didRegisterForRemoteNotificationsWithDeviceToken:(NSData*)deviceToken
{
NSLog(@"My token is: %@", deviceToken);
const char *data = [token bytes];
NSMutableString *tokenString = [NSMutableString string];
for (NSUInteger i = 0; i < [token length]; i++) {
[tokenString appendFormat:@"%02.2hhx", data[i]];
}
NSLog(@"And this is the string representing the token %@", tokenString);
}
func application(_ application: UIApplication, didRegisterForRemoteNotificationsWithDeviceToken deviceToken: Data) {
    let tokenMapped = deviceToken.map { data in String(format: "%02.2hhx", data) }
    let tokenString = tokenMapped.joined()
    print("did register for notifications token string = \(tokenString)")
}
you can copy the output or the second NSLog and use it with python to send the notification.
Send a push notification
Once you have the device token you can try to send a push notification.
For my tests I always use PyAPNs2 as I can download it from github, edit a single python file and quickly verify my app is set correctly to handle push notifications.
You can download PyAPNs2 here
https://github.com/Pr0Ger/PyAPNs2
then copy the pem certificate you created before by merging the key and the certificate into the folder where you have PyAPNs2.
Create a new python file into the same folder, I call it push.py and past this code there
from apns2.client import APNsClient
from apns2.payload import Payload


token_hex = 'aae239130200dd4bb884614bbd145b3a6382d50d30f753e2243b7de1af2d444a'
payload = Payload(alert="My first push notification!!", sound="default", badge=1)
topic = 'com.gfrigerio.push'
client = APNsClient('pushcertificates.pem', use_sandbox=True, use_alternative_port=False)
client.send_notification(token_hex, payload, topic)
token_hex is the device token you got from didRegisterForRemoteNotificationsWithDeviceToken.
In payload you can put your push notification, you have the text, you can specify a sound and the badge, aka the red number you see on the top right of your app icon. The topic is our bundle identifier.
The following line creates the client object with the certificate file we created before and a parameter for the environment, I set True for use_sandbox as we are using the test certificate, be sure to set False if you’re using the production certificate.
Run the command and you should receive the notification on your device.
Get the notification in your app
We’re not done yet, at least if you want to do something with the notification you sent to the device.
Let’s start with something easy and clear the badge when your app is launched.
[UIApplication sharedApplication].applicationIconBadgeNumber = 0;
UIApplication.shared.applicationIconBadgeNumber = 0
This sets your badge number count to 0 and removes the red icon. When you send a notification you can specify a number and it may be 0, so it won’t show the red icon at all but usually you want to set 1 so if your user dismiss the alert he can still see a badge on your app icon. It is really up to you, for a messaging app like Whatsapp the badge should indicate how many unread messages you have, same for a mail app, otherwise 1 should be ok. You can clear the badge number anywhere in the code, but if no action is required (like reading the message in mail) you can clean it as soon as you enter the app in one of the functions of your application delegate, like applicationWillEnterForeground or didFinishLaunchingWithOptions. I never implemented a messaging app, so I clear the badge right after I finish launching my app.
What if your notification contains something important to your app? You can send a JSON with some information (like a preview of the message for a messaging app) and even if you don’t send any meaningful data you may want to know your app has received a push notification. You can do that by implementing didReceiveRemoteNotification in your application delegate
Swift
func application(_ application: UIApplication, didReceiveRemoteNotification userInfo: [AnyHashable : Any], fetchCompletionHandler completionHandler: @escaping (UIBackgroundFetchResult) -> Void) {
        guard let aps = userInfo["aps"] as? [String: AnyObject] else {
        completionHandler(.failed)
        return
    }
    print("did receive notification with content \(aps)")
}
This function is called if your app is running or was in background and is launched by tapping on the notification and userInfo contains the badge count, the text and optional data.
If the app wasn’t running and is launched for the first time by tapping on the notification you can get its info in the app’s delegate didFinishLaunchingWithOptions
func application(_ application: UIApplication, didFinishLaunchingWithOptions launchOptions: [UIApplication.LaunchOptionsKey: Any]?) -> Bool {
        if  let options = launchOptions,
            let notificationOptions = options[.remoteNotification] {
            print("application was launched by a notification")
            print(notificationOptions)

            if let notification = notificationOptions as? [String: AnyObject],
                let aps = notification["aps"] as? [String: AnyObject] {
                print(aps)
            }
        }
        return true
    }
Use Authentication Keys
There is an alternative way to deal with push notifications, and that’s authentication keys. I started my example with PyAPNs2 and the certificates as it is what I’ve used server side, but if you want to quickly test if APN is working on your app you can use another great utility (with a GUI!) from github
https://github.com/onmyway133/PushNotifications
With PushNotifications you can try sending Apple and Google push notifications on iOS and Android. You can use the .p12 certificate exported by Keychain Access, but you can also use a single file downloaded from the developer portal with a couple of keys.
Go to the developer portal where you created the App ID and click on Keys, then add one
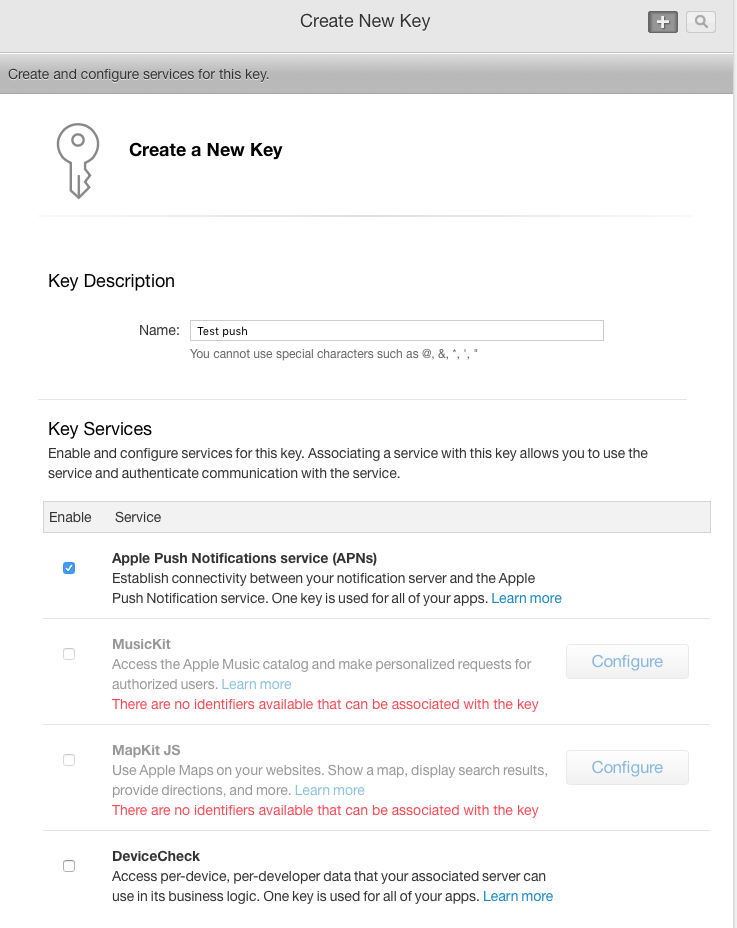
be sure to check Apple Push Notifications service.
At the end of the wizard you’ll be able to download a .p8 certificate to use with PushNotifications. Save the key (Apple puts it in the file name for convenience) and get your Team ID, an easy way to read it is clicking on the App ID and copy the value of Prefix.
With the p8 certificate, the key and your Team ID you can use PushNotification to send your test push.
In a future article I’ll explore Local Notifications and what you can do with silent notifications.
If you want to read more about the payload this is the official documentation
https://developer.apple.com/documentation/usernotifications/setting_up_a_remote_notification_server/generating_a_remote_notification?language=objc
Happy coding!